Showing posts with label crafts. Show all posts

Sew a Valentine's Day Card Bucket or Bag

A new pattern is in my shop
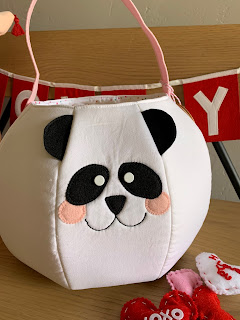
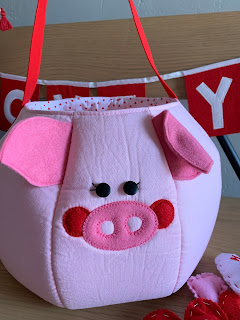
You will LOVE making this pig or panda bag.
The animal lover in your life will LOVE that you made it for them.
Perfect for collecting cards, giving a Valentine's Day treat or decorating your home.
It will become a treasured part of your family celebrations.
The PDF digital pattern includes both views.


Featuring a rosy cheeked pig with the cutest curly tail.

Pig bag

And a huggable panda bear.


Panda Bear

You can purchase it on Etsy, and download it today!
Easy right?


Printing and Assembling Your PDF Pattern

If you are new to using downloadable PDF sewing patterns; here are some hints to get you started.
I sale my patterns on etsy, and they have an awesome way to access your downloadable purchases. Just click on your profile, go to "my purchases and reviews," scroll through to find your purchase and click on the black box to the right of the purchase that says,"download." You are able to download to your device from here. A downloadable link is also emailed to you once you've made your purchase. Keep in mind that you cannot access your purchases from the etsy app, you must use the website.
After purchasing a PDF pattern, save it on your drive where YOU can find it. Whether it's on the hard drive of your device, or on a Cloud account (like Google Drive) keep a copy of it.
Next, you need a PDF reader on your device. This is an app that will allow you to open, read and print your PDF. I use Adobe Acrobat Reader. It's free.
Open your pattern using the Reader.
Since some pattern pieces are larger than a usual home printer can print, there are usually multiple sheets to attach together.
Print the pattern pages. In the settings of your printer, choose "Actual Size" or "No Scaling." You need this step to be 100% accurate! Otherwise, your pattern will not fit together. Most patterns have a test square that you measure to make sure it is printed to the correct size. Don't skip this step.
Trim the blank borders from the pattern sheets. Leave some of the borders to have a surface to adhere to. I love my paper trimmer, it makes quick work of cutting clean, straight lines.

Line up the printed sheets in order to get your large pattern pieces. Keep it all as accurate and smooth as possible.
**In my patterns, you use the background 1 inch grid squares and the pattern lines to help you keep it all straight and lined up. I also include a layout in the written instructions of how to assemble the pattern sheets. Every brand of pattern will vary slightly, but the goal is to create large, accurate pieces.**
Last, tape the sheets together. You can use a glue stick, but I find the clear tape easier to smooth and keep control of the piece.

And there you go. You now have large pattern pieces that are ready to use!


Valentines Day Mailboxes

When I was a kid, my mom always made sure there was plenty of eyelet lace and red wrapping paper with tiny white hearts for all 4 girls to make proper Valentines Day mailboxes for school. I'm not sure what my brother did, but I'm sure it was fantastic with as artistic as he is, but I really don't recall. I was always so proud that my mom let us use wrapping paper instead of construction or butcher paper. I think that's probably where my vanity began.....

Now, as the mother of 2 elementary school boys, non graded projects like the Valentines mailboxes excite me to no end. My boys, well, they couldn't care less. Unless of course my plans (which they would have loved in preschool) make them look ridiculous in front of their friends, then suddenly they have an opinion.

So here are our mailboxes for your viewing pleasure:

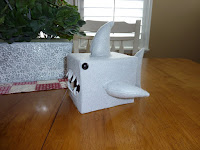
This year's addition was inspired by these, but made "more manly" by making an angrier, man eating version. Nothing says romance like flesh eating fish. We covered our box with felt, I stitched the fins while S stuffed them and hot glued them on. I was thinking craft foam would have been a cool covering (smooth like shark skin) but REALLY didn't want to make a craft project completely unbearable for an almost 10 year old by a trip to the store. This box took us about 30 minutes to make, and that was pushing his interest level. But he really likes it. It's a bit on the small side, but he will definitely be the only kid in his class with a shark-esque mailbox.

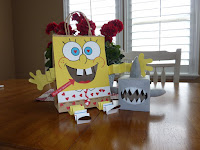
And here is one made in 2007. It took me so long to make that I make sure it reappears each year among our Valentines decor. Maybe it's because I made it the night before the party, in the wee hours of the morning while feeding a two week old Miss A- but whatever. Maybe it's because S had no opinion other than it needed to be Sponge Bob. Maybe it's because after Sponge Bob had his limbs ripped from his body, I lovingly restored him. Maybe it's because I'm lazy and hope that one of the boys will want to use it again sometime. S has used it twice and G hasn't needed a mailbox yet. G's teachers have the kids make them at school- a conspiracy to squelch the creativity of over achieving mothers such as myself no doubt ;)
Are you noticing a theme? Square. Lives in the sea.